
The moment chicken thigh meets screaming-hot stainless steel, a sonic signature fills the kitchen: that aggressive, water-repelling sizzle that tells you Maillard is about to work overtime. The surface tension breaks, proteins seize, and within ninety seconds, a bronze lacquer begins forming on poultry that most home cooks boil into oblivion. Mastering pan frying chicken recipes isn't about following timid instructions; it's about controlling heat, managing moisture, and understanding that a 165°F internal doesn't mean you pull at 165°F. These seven expert-level techniques transform supermarket chicken into restaurant-caliber plates, using nothing more than a heavy pan, attentive timing, and a few micro-adjustments that separate amateur from professional. Forget the deep fryer. Forget the oven-finish crutch. This is pure stovetop alchemy where crust development, juice retention, and flavor layering happen in a single vessel, and every variable, from ambient humidity to residual heat, becomes your tool rather than your obstacle.
The Gathers
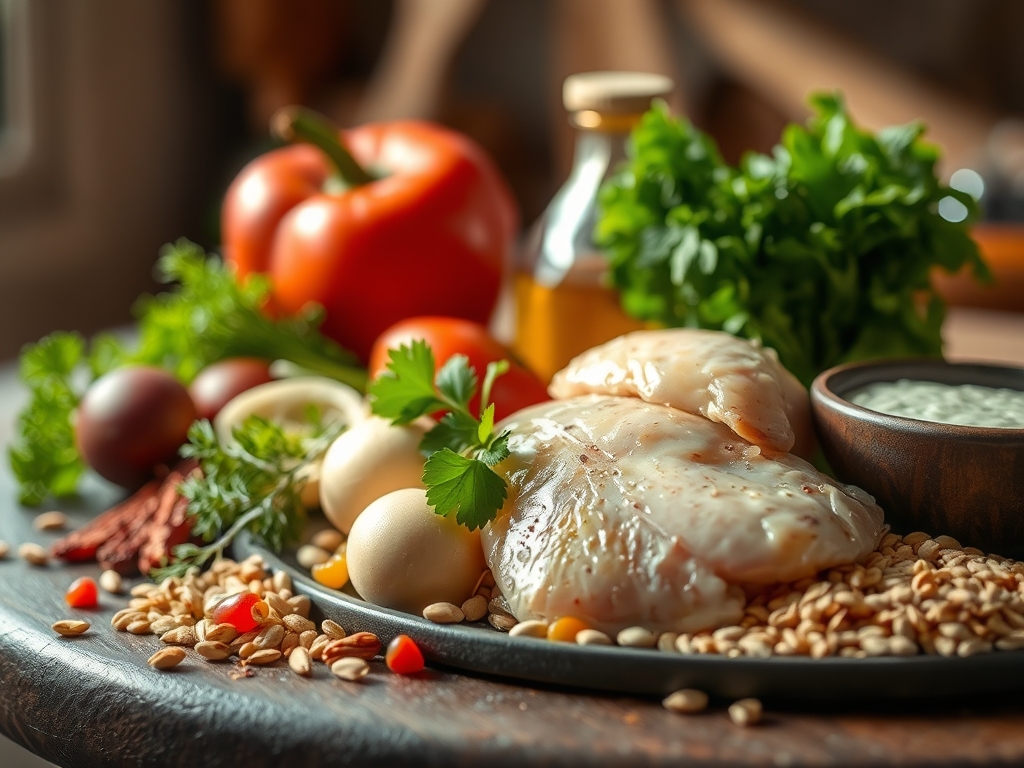
As you see in the ingredient spread below, the raw architecture is deceptively simple: bone-in, skin-on chicken thighs (the failsafe cut, fat content around 18%), kosher salt (Diamond Crystal for even distribution), neutral oil with a 400°F+ smoke point (grapeseed, avocado, or refined peanut), black pepper (whole peppercorns you crack yourself), and unsalted butter for basting in the final minute. Optional but transformative: smoked paprika, garlic powder, or a whisper of cayenne for the skin rub. The thighs should be fridge-cold but surface-dry; moisture is the enemy of crust.
Smart Substitutions: Swap thighs for skin-on breasts if you must, but reduce cook time by 25% and brine for 30 minutes in 3% salt solution. Use clarified butter or ghee if smoke point concerns plague you. For oil-free fanatics, a carbon steel pan with just chicken fat rendering works, but you sacrifice initial sear velocity.
The Clock
Prep Time: 10 minutes (pat dry, season, temper)
Cook Time: 18 minutes (14 active sear, 4 rest off-heat in pan)
Total Time: 28 minutes
Chef's Flow: While the pan preheats over medium-high for a full 4 minutes, prep your aromatics and set a plate lined with a wire rack, not paper towels. Paper towels steam the underside and ruin your crust. Manage two tasks during the 8-minute skin-side sear: monitor edge browning and prepare your basting fat. This parallel processing cuts dead time and keeps your head in the pan, not the clock.
The Masterclass
Step 1: Surface Prep and Seasoning
Remove chicken from refrigeration 15 minutes before cooking. Blot every surface with lint-free towels, pressing gently into skin crevices where water hides. Season aggressively with kosher salt (1/2 teaspoon per thigh), focusing on the skin side, then crack black pepper over top.
Chef's Secret: Cold protein hitting a hot pan creates a moisture gradient that drives surface dehydration faster than room-temp protein, giving you a jump-start on crust formation before internal temp climbs.
Step 2: The Initial Sear
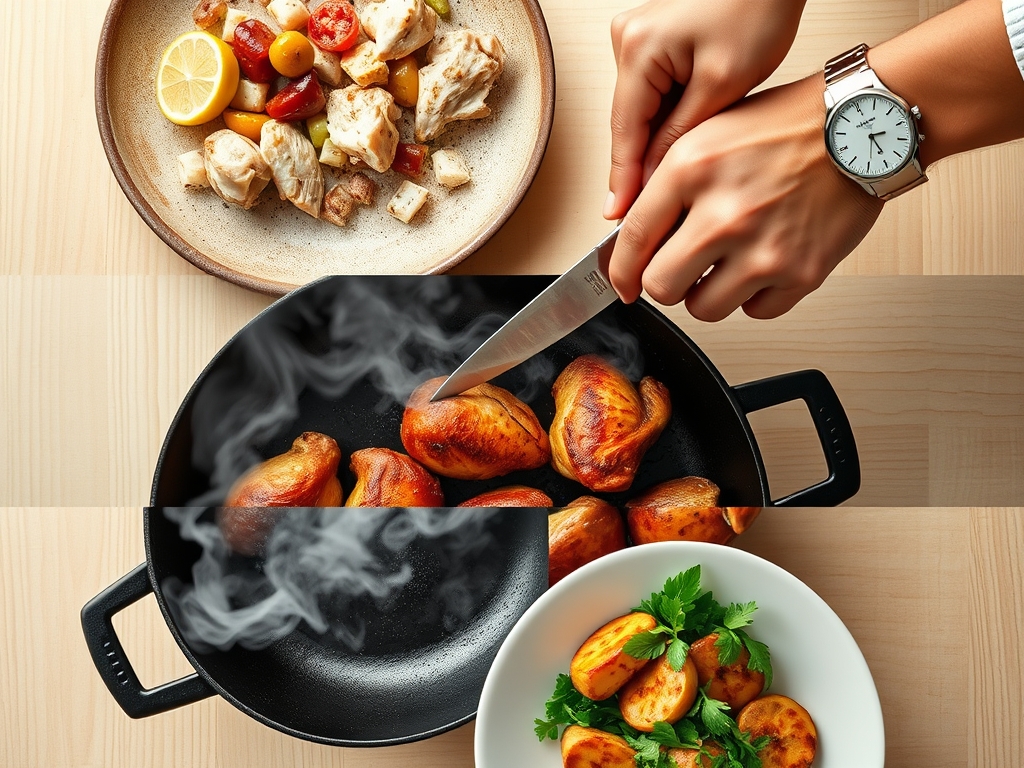
Heat your heaviest pan (cast iron or tri-ply stainless) over medium-high until a water droplet fractures into beads and skitters. Add oil to barely coat the bottom. Lay thighs skin-side down, pressing gently with a fish spatula for five seconds to ensure full contact. Do not move them.
Why It Works: Proteins bond to metal initially, then release cleanly once a polymerized crust forms. Fidgeting interrupts this process and tears the skin.
Step 3: The Long Sear
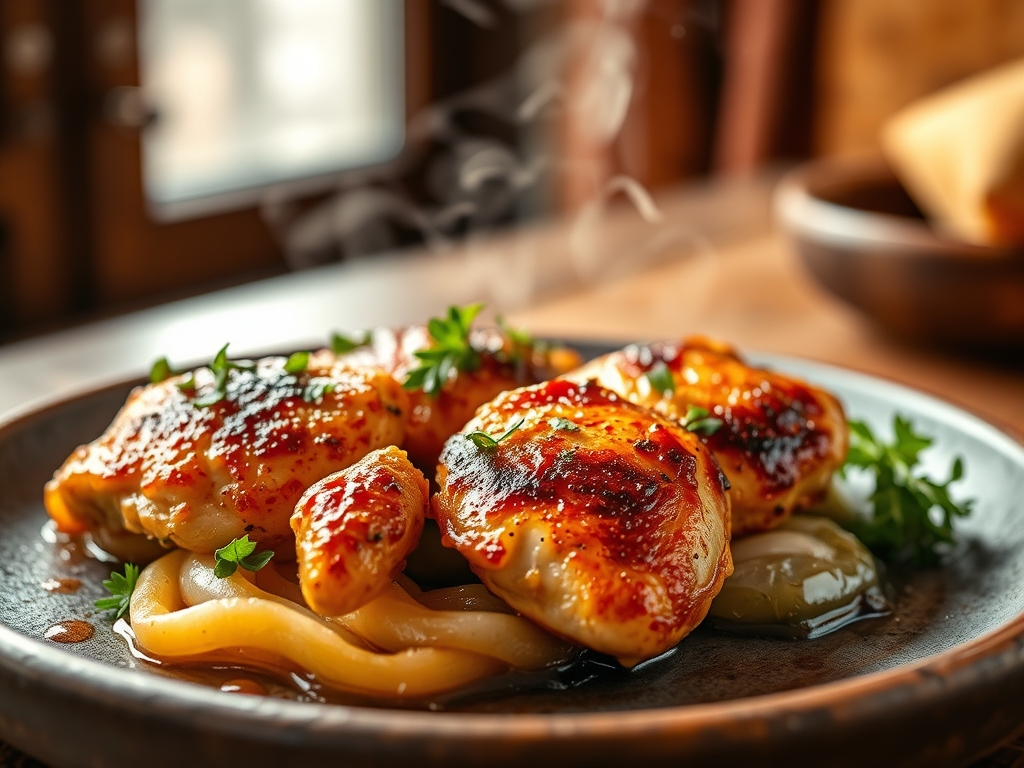
Sear skin-side down for 8 to 10 minutes, adjusting heat if smoking becomes acrid. You want a steady sizzle, not a smoke alarm. Note the texture shown in the step-by-step photos: mahogany edges creeping inward, fat rendering out, skin tightening.
Chef's Secret: Tilt the pan slightly and spoon hot oil over exposed skin edges. This self-basting accelerates even browning without flipping prematurely.
Step 4: The Flip and Finish
Flip thighs once skin is deeply bronzed and releases without resistance. Sear flesh side for 4 minutes. Add a tablespoon of butter, let it foam, then tilt and baste the skin repeatedly for 60 seconds.
Why It Works: Butter solids contain lactose and proteins that brown independently, adding a secondary layer of nutty complexity. The emulsified fat also carries seasoning into micro-crevices.
Step 5: The Carryover Rest
Kill the heat. Leave thighs in the pan, skin-side up, for 4 minutes. Internal temp will coast from 155°F to 165°F via residual thermal energy from the pan and the meat's own core heat diffusion.
Chef's Secret: Carryover cooking is non-negotiable. Pulling at 165°F yields 172°F by plate time, resulting in dry, chalky texture. Embrace the gradient.
Nutritional Info
Per thigh (approx. 150g cooked):
Calories: 280
Protein: 26g
Fat: 19g (7g saturated)
Carbohydrates: 0g
Sodium: 420mg (varies with salt application)
Skin-on chicken retains more fat-soluble vitamins (A, D, E) and conjugated linoleic acid compared to skinless cuts. The rendering process reduces total fat by roughly 15% compared to raw weight.
Dietary Swaps
Keto/Low-Carb: Already compliant. Increase fat by pan-roasting in duck fat.
Gluten-Free: Naturally gluten-free; avoid cross-contaminated spice blends.
Vegan: Substitute king oyster mushroom "scallops," salted and pressed for 20 minutes, then seared in the same technique. The fibrous structure mimics poultry chew.
Paleo: Use avocado oil, skip butter, finish with ghee.
Serving & Presentation
Minimalist Plate: Center the thigh on wilted greens (spinach, chard), lean it against a smear of cauliflower puree, drizzle pan drippings over the skin.
Rustic Board: Slice thigh on the bias, fan over charred lemon halves and microgreens, scatter flaky salt.
Elevated Comfort: Nest on creamy polenta, top with a soft herb salad (parsley, dill, chives) dressed in lemon and olive oil.
The Pro-Dodge
Pitfall 1: Soggy skin. You didn't dry thoroughly, or your pan wasn't hot enough. **Fix:**Reheat the empty pan until shimmering, return chicken skin-down for 90 seconds.
Pitfall 2: Scorched exterior, raw interior. Heat too high. Fix: Reduce to medium after the flip, tent loosely with foil, extend cook by 3 minutes.
Pitfall 3: Sticking and tearing. Protein didn't form a crust. Fix: Let it cook untouched another 2 minutes; it will release when ready.
The Meal Prep Corner
Store cooked thighs in an airtight container layered with parchment, refrigerated up to 4 days. Reheat in a 375°F oven on a wire rack for 8 minutes to re-crisp skin; microwaving turns it into rubber. Freeze individually wrapped for up to 2 months. Thaw overnight in the fridge, then oven-crisp as above. Day-one quality depends on avoiding steam during reheating, so always use dry heat methods.
The Wrap-Up
Pan-fried chicken isn't a Wednesday night compromise; it's a skill set that rewards attention, patience, and a willingness to let physics do the heavy lifting. Every sizzle is data. Every crust is feedback. Master these seven techniques and you'll stop searching for pan frying chicken recipes online because you'll intuitively adjust heat, timing, and fat to any cut, any pan, any altitude. Now, fire up that skillet, listen closely, and let the Maillard reaction become your co-chef. Drop your biggest chicken win or your most spectacular fail in the comments below; we learn faster together.
The Kitchen Table
Q: Can I use boneless, skinless chicken breasts?
A: Yes, but reduce total cook time to 10 minutes (5 per side), brine in 5% salt solution for 30 minutes beforehand, and accept you'll never achieve the same crust without skin's fat content and collagen.
Q: What's the best pan for pan frying chicken recipes?
A: Cast iron retains heat best for even crust development. Tri-ply stainless offers more responsive temperature control. Avoid nonstick; it can't sustain the high heat needed for proper Maillard browning.
Q: How do I know when chicken is done without a thermometer?
A: You don't, reliably. Invest in an instant-read thermometer. Visual cues (clear juices, firm texture) lag behind actual internal temp and risk under or overcooking.
Q: Why does my chicken release so much liquid?
A: Factory chicken is often plumped with up to 15% saltwater solution. Look for "air-chilled" or organic labels, and always dry brine for 2 hours before cooking to purge excess moisture.
Q: Can I reuse the pan drippings?
A: Absolutely. Deglaze with white wine or stock, scrape up the fond, reduce by half, and you have an instant pan sauce. Strain out any burnt bits first.