
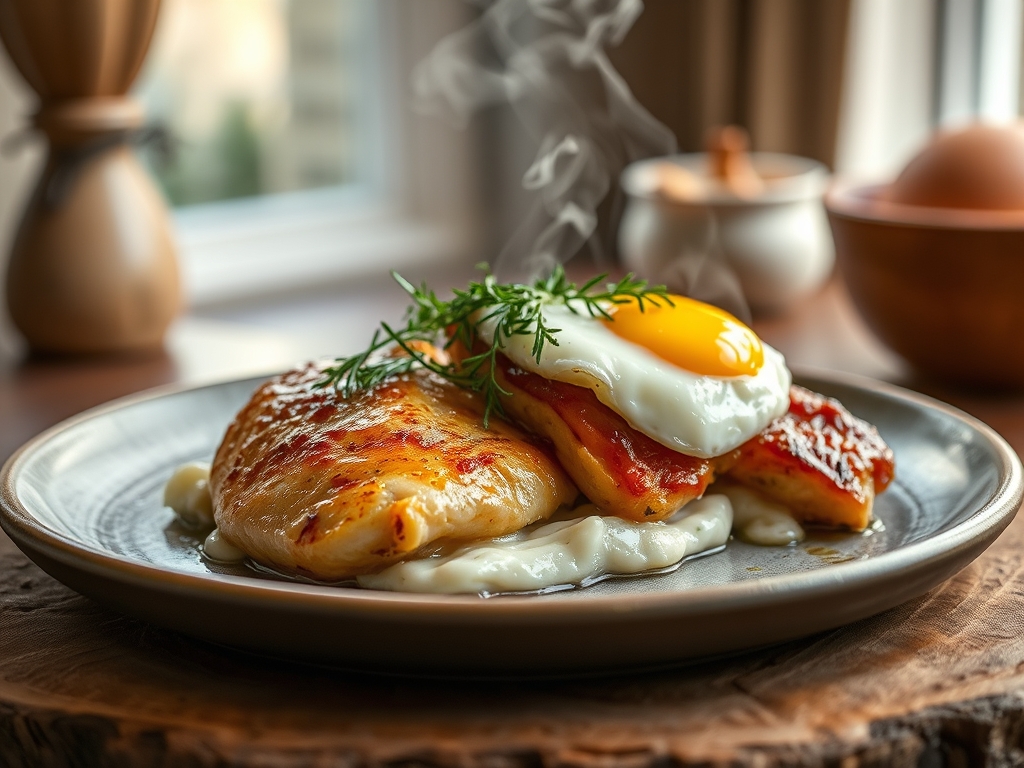
Imagine a sizzling skillet where the golden lace of a fried egg meets the savory crunch of a perfectly seared breast. Exploring chicken recipes with egg is more than a culinary trope; it is a masterclass in protein synergy and textural contrast. Whether you are folding silken yolks into a rich carbonara or using whites as a molecular glue for breading, this duo defines comfort.
The chemistry here is fascinating. When you combine the lean, fibrous structure of poultry with the lipid-rich, emulsifying power of an egg, you create a mouthfeel that is both decadent and structurally sound. We are moving far beyond the basic breakfast scramble. We are talking about deep, amber Maillard reactions on the skin and the precise coagulation of proteins that turn a simple dinner into a restaurant-quality event. Grab your heavy-bottomed skillet and a whisk. We are about to deconstruct the most iconic "which came first" duo in the history of the kitchen with a side of witty science and high-energy flavor.
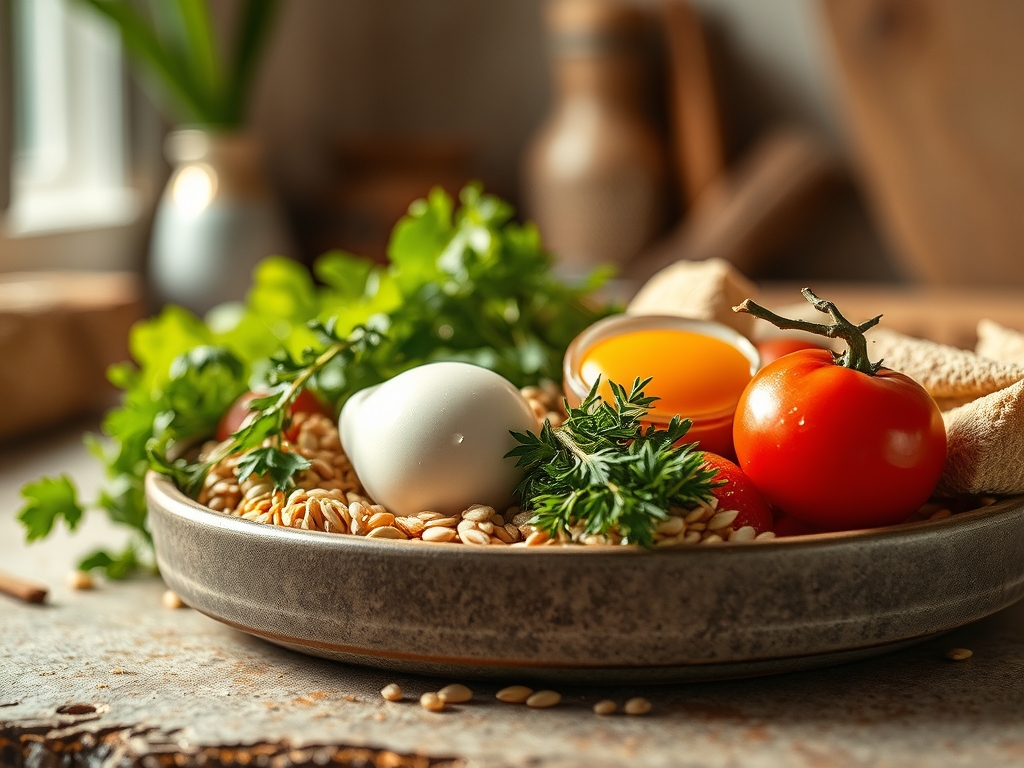
The Gathers:
Setting up your mise-en-place is a lesson in thermodynamics and viscosity. To master these chicken recipes with egg, you need your ingredients at specific temperatures to ensure successful emulsification and protein bonding.
- The Poultry: Use organic, air-chilled chicken thighs or breasts. Air-chilling prevents excess water weight, ensuring a better sear.
- The Eggs: Large, pasture-raised eggs provide a higher lecithin content in the yolk, which is the secret to a stable sauce.
- The Aromatics: Freshly grated garlic and ginger. Use a microplane to achieve a fine paste that integrates without burning.
- The Fats: High-smoke point oils like avocado oil for searing, and cold, unsalted butter for finishing sauces.
- The Seasoning: Diamond Crystal kosher salt for controlled salinity and freshly cracked tellicherry peppercorns.
Smart Substitutions:
If you are avoiding dairy, swap the butter for a high-quality ghee; it retains the nutty flavor but removes the milk solids. For a low-carb twist, replace traditional breadcrumbs with crushed pork rinds or almond flour to maintain that essential crunch without the glycemic spike.
The Clock
Efficiency in the kitchen is all about "Chef's Flow." This is the art of overlapping tasks so that no component sits long enough to lose its structural integrity.
- Prep Time: 20 minutes. This includes your knife work and bringing the chicken to room temperature. Cold meat hits a hot pan and drops the temperature, leading to steaming rather than searing.
- Cook Time: 25 to 35 minutes depending on the thickness of the protein.
- Total Time: Approximately 55 minutes.
The flow begins with the "Hard Prep" (chopping and measuring). While the chicken rests after its initial sear, you utilize the deglazing window to build your egg-based sauce. This ensures the egg proteins do not over-coagulate or "scramble" while waiting for the meat to finish.
The Masterclass

1. The Tempering Phase
Before the chicken touches the heat, pat it bone-dry with paper towels. Moisture is the enemy of the Maillard reaction. Season aggressively from a height to ensure even distribution of salt crystals.
Pro Tip: This is called osmotic regulation. Salt draws moisture to the surface; if you wait 15 minutes, the brine reabsorbs, seasoning the meat deeply and breaking down tough muscle fibers.
2. The Sear and Render
Place the chicken skin-side down in a preheated heavy-bottomed skillet. Use tongs to press the meat down, ensuring maximum surface contact. Do not move it until it releases naturally from the pan.
Pro Tip: This prevents protein bonding to the metal. When the sugars and amino acids reach 285 degrees Fahrenheit, they reorganize into hundreds of new flavor compounds.
3. The Deglaze
Remove the chicken and set it on a wire rack. Pour off excess fat, leaving about a tablespoon. Add a splash of dry white wine or chicken stock, using a bench scraper or wooden spoon to lift the "fond" (the brown bits) from the bottom.
Pro Tip: This is an acid-base reaction that captures the concentrated chicken essence, forming the flavorful base for your egg emulsion.
4. The Egg Tempering
In a separate saucier, whisk your eggs with a tablespoon of warm liquid from the pan. Slowly stream this mixture back into the skillet over low heat, whisking constantly.
Pro Tip: This prevents thermal shock. By gradually raising the temperature of the eggs, you avoid denaturing the proteins too quickly, which results in a grainy texture.
5. The Emulsion Finish
Whisk in cold butter cubes one at a time. The sauce should become glossy, thick, and viscous, coating the back of a spoon perfectly.
Pro Tip: This is a fat-in-water emulsion. The lecithin in the egg yolk acts as a bridge between the watery stock and the fatty butter, creating a silky mouthfeel.
6. The Final Integration
Return the chicken to the pan just long enough to coat it in the sauce. Garnish with fresh herbs using sharp kitchen shears to avoid bruising the delicate leaves.
Pro Tip: Watch for thermal carryover. Chicken continues to rise about 5 degrees in temperature after being removed from the heat. Pull it at 160 degrees Fahrenheit for a final perfect 165.
The Deep Dive
Macro Nutrition
A standard serving of these chicken recipes with egg provides approximately 35g of protein, 12g of healthy fats, and 2g of carbohydrates. It is a high-density meal that supports muscle recovery and provides sustained satiety due to the combination of leucine in chicken and choline in eggs.
Dietary Swaps
- Keto: Follow the recipe as written, ensuring your "thickener" is purely egg yolk and butter rather than flour.
- Vegan: Replace chicken with oyster mushrooms and use a "flax egg" or silken tofu blended with nutritional yeast for the sauce.
- Gluten-Free: Ensure your chicken stock is certified GF and use tamari instead of soy sauce if the recipe calls for an umami boost.
The Fix-It: Troubleshooting Common Pitfalls
- The Sauce Scrambled: If the heat was too high and you see curds, quickly whisk in a teaspoon of heavy cream or a splash of cold water to drop the temperature and re-emulsify.
- Soggy Chicken Skin: This happens if you crowd the pan. Ensure there is at least an inch of space between pieces to allow steam to escape.
- Bland Interior: If the meat is flavorful outside but dry inside, you likely skipped the "tempering" and "resting" phases. Always rest meat for 5 minutes before slicing.
Meal Prep: The Reheating Science
To maintain "day-one" quality, avoid the microwave. The microwave vibrates water molecules, which toughens chicken proteins and turns egg sauces rubbery. Instead, reheat in a covered skillet over low heat with a teaspoon of water to create a gentle steam sauna.
The Wrap-Up
Mastering chicken recipes with egg is your ticket to becoming the most popular person in your social circle. It is a sophisticated, high-protein approach to cooking that relies on technique rather than expensive gadgets. When you understand how heat transforms these two humble ingredients into a culinary masterpiece, you are no longer just following a recipe; you are conducting a symphony of flavors. Now, get into that kitchen and make some magic happen.
The Kitchen Table
Can I use egg whites instead of whole eggs?
Yes, but you will lose the emulsifying power of the yolk. Egg whites provide a crispier coating for fried chicken but will not create a creamy sauce. Whites are best for "velveting" meat in stir-fry applications.
Why did my egg sauce turn out thin?
The sauce likely did not reach the "nappe" stage. You must gently heat the egg mixture until the proteins begin to cross-link, thickening the liquid. Be careful not to exceed 175 degrees Fahrenheit or it will curdle.
How do I get the chicken skin extra crispy?
The secret is dryness and pH. Pat the skin dry and leave the chicken uncovered in the fridge for two hours. A tiny pinch of baking powder mixed with the salt also helps accelerate the browning process.
Is it safe to put raw eggs in a warm sauce?
Yes, provided the sauce reaches 160 degrees Fahrenheit. This temperature is sufficient to kill salmonella while maintaining a creamy, liquid state. Always use fresh, high-quality eggs for the best safety and flavor profile.