
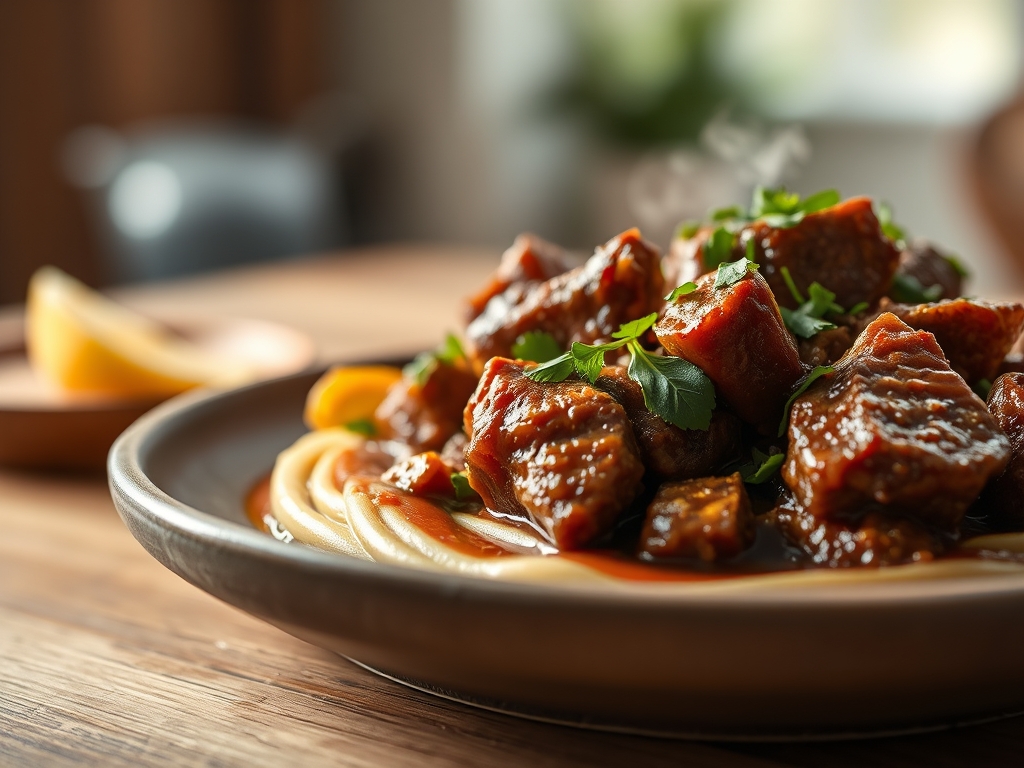
Picture the steam rising from a heavy-bottomed Dutch oven as the scent of searing protein fills your kitchen. There is a specific, primal joy in watching high-quality fat render into a shimmering liquid gold. When you master one pot beef recipes, you are not just making dinner; you are conducting a symphony of heat and chemistry without the burden of a sink full of dishes. It is about efficiency, flavor concentration, and that glorious, sticky fond that builds at the bottom of your pan.
We have all been there. It is 6:00 PM, you are exhausted, and the idea of managing four different burners feels like a personal affront. This is where the magic of the single vessel comes into play. By utilizing a heavy-bottomed skillet or a cast iron pot, you create a closed-loop system where no flavor escapes. Every drop of juice from the beef is absorbed by your starches and aromatics. It is the ultimate culinary hack for the modern, busy professional who still demands a five-star meal.
In this guide, we are diving deep into nine distinct variations of one pot beef recipes that range from zesty stir-fries to velvety stews. We will explore why your meat sometimes turns out "gray" instead of "golden" and how to fix it using nothing but science and a bit of kitchen wit. Grab your favorite apron and a glass of wine; we are about to turn your kitchen into a high-efficiency flavor laboratory.
The Gathers:
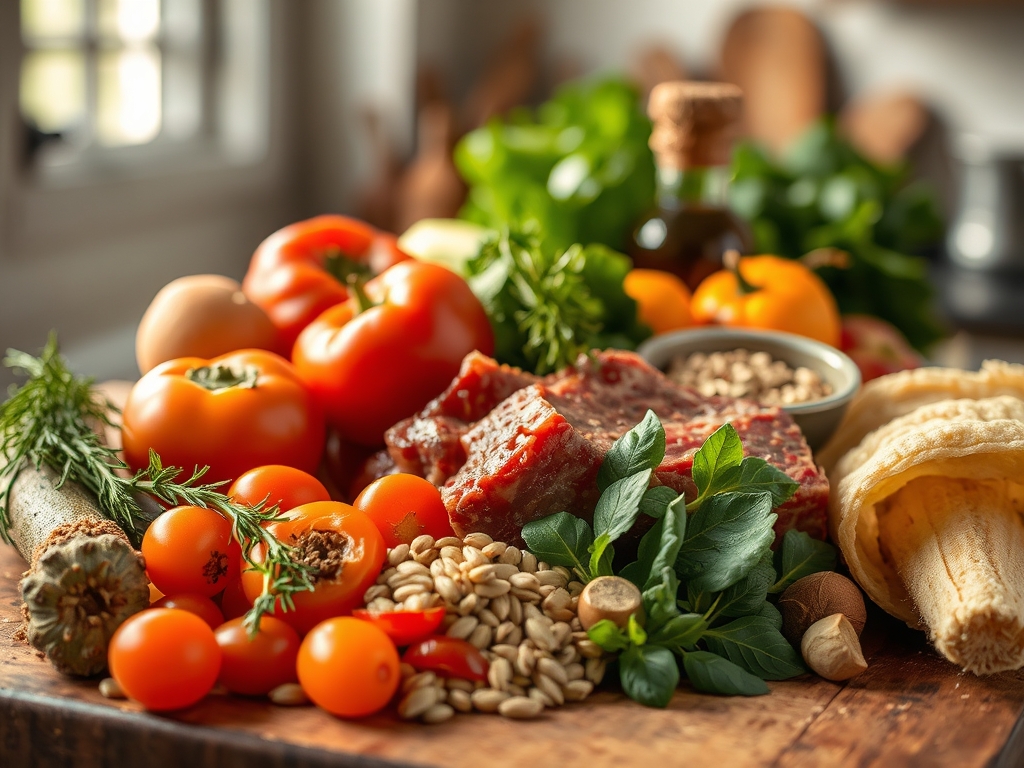
Before we apply heat, we must respect the mise-en-place. To achieve professional results, you need a digital scale to ensure your ratios are precise. For these recipes, you will want to gather high-fat-content cuts like chuck roast or ribeye for slow cooks, and lean flank or skirt steak for quick sears. Your aromatics should be prepped with a sharp chef knife or a bench scraper to move them efficiently from the board to the pot.
You will also need a microplane for zesting citrus and grating fresh ginger or garlic. This tool increases the surface area of your aromatics, allowing them to melt into the sauce and create a more viscous mouthfeel. Do not forget your deglazing liquids: dry red wine, beef bone broth, or even a splash of piquant balsamic vinegar. These liquids are essential for lifting the caramelized sugars off the bottom of the pan.
Smart Substitutions:
If you find yourself without a specific cut of beef, do not panic. You can swap chuck roast for brisket or short ribs; both have the connective tissue necessary for a long braise. For quick-cooking recipes, if flank steak is unavailable, a tri-tip or even a well-marbled sirloin will suffice. If you are avoiding alcohol, replace the wine with a mixture of beef stock and a tablespoon of apple cider vinegar to provide that necessary acidic "brightness" that cuts through the richness of the fat.
The Clock: Chef's Flow
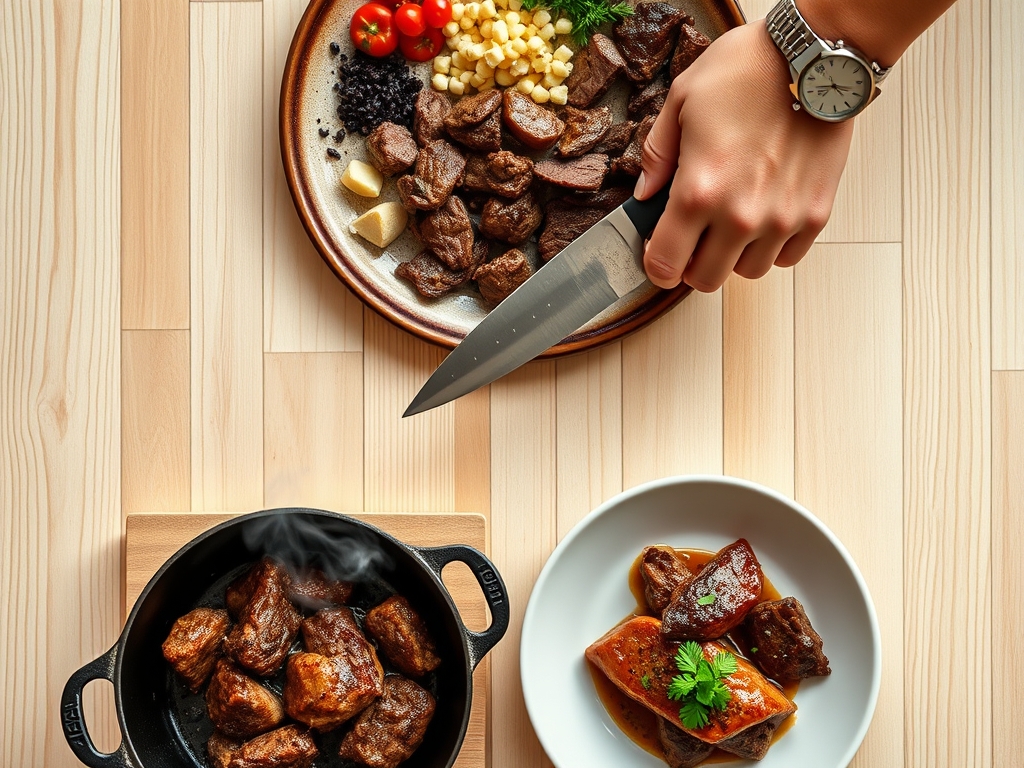
Efficiency in the kitchen is about "The Flow." For these one pot beef recipes, expect a total time commitment of 30 to 90 minutes depending on the cut. Prep time usually takes about 15 minutes of active chopping and measuring. The "Chef's Flow" dictates that you should prep your vegetables while the beef is searing. Since the searing process takes about 8 to 10 minutes to achieve a proper Maillard reaction, use that window to dice your onions and carrots.
The cooking phase is divided into the "Active Sear" and the "Passive Simmer." During the simmer, the heat does the heavy lifting for you. This is the perfect time to clean your workspace or prep a simple side salad. Remember, the goal of one-pot cooking is to minimize total kitchen time, not just active cooking time. By the time the timer dings, your kitchen should be clean and your table set.
The Masterclass:
1. The High-Heat Sear
Start by patting your beef bone-dry with paper towels. Moisture is the enemy of browning. Heat your heavy-bottomed skillet until the oil just begins to shimmer and reach its smoke point. Place the beef in the pan, ensuring you do not overcrowd it. If you crowd the pan, the temperature drops and the meat will steam in its own juices rather than sear.
Pro Tip: This is the Maillard reaction in action. It is a chemical reaction between amino acids and reducing sugars that gives browned food its distinctive flavor. If the meat is sticking, it is not ready to be flipped. Wait for it to naturally release from the surface.
2. Deglazing the Fond
Once the meat is removed, you will see brown bits stuck to the bottom. This is "fond," and it is concentrated flavor. Pour in your liquid (wine, broth, or vinegar) and use a wooden spoon or a saucier whisk to scrape those bits up.
Pro Tip: This process uses solvent extraction. The alcohol or acid in your liquid dissolves the flavorful compounds that are not water-soluble, integrating them back into your sauce for a more complex profile.
3. Sweating the Aromatics
Add your onions, garlic, and mirepoix to the deglazed pan. Lower the heat slightly to avoid burning the garlic. You want the onions to become translucent, a process known as "sweating."
Pro Tip: Sweating breaks down the cellulose walls of the vegetables, releasing their natural sugars. Adding a pinch of salt here uses osmosis to draw out moisture, speeding up the softening process without browning.
4. The Flavor Infusion
Add your spices and tomato paste now. Toasting your spices in the residual fat for 60 seconds will "bloom" them, making their fat-soluble flavor compounds more volatile and aromatic.
Pro Tip: This is called tempering. By heating spices in fat, you unlock essential oils that remain dormant in dry form. It creates a deeper, more resonant flavor that permeates the entire dish.
5. The Low and Slow Simmer
Return the beef to the pot and add your remaining liquids and starches (like potatoes or pasta). Cover with a tight-fitting lid to trap steam. This creates a high-pressure environment that forces flavor into the meat.
Pro Tip: During this stage, collagen (the tough connective tissue) slowly converts into gelatin. This is why "tough" cuts become fork-tender. Gelatin also adds a silky, luxurious body to your sauce.
6. The Final Emulsification
Before serving, if your sauce looks a bit thin, remove the lid and increase the heat for a few minutes. You can also whisk in a knob of cold butter or a splash of heavy cream to finish.
Pro Tip: This creates an emulsion. The fat molecules are suspended in the water-based sauce, creating a thick, glossy coating that clings to your beef and vegetables.
The Deep Dive:
From a nutritional standpoint, one pot beef recipes are powerhouses of bioavailable iron, B12, and zinc. To keep things balanced, aim for a 1:2 ratio of beef to vegetables. If you are following a Keto lifestyle, swap potatoes for cauliflower florets or radishes, which take on a potato-like texture when braised. For a Vegan alternative (though we are talking beef today), hearty mushrooms like Portobello or King Oyster provide a similar "umami" profile. Gluten-free diners should ensure their beef broth is certified and use tamari instead of soy sauce.
The Fix-It:
If your beef is "tough," it simply hasn't cooked long enough for the collagen to break down; give it another 20 minutes. If the sauce is too salty, add a peeled potato to the pot for 10 minutes to absorb excess sodium, then discard it. If the flavor feels "flat," add a squeeze of lemon juice or a teaspoon of vinegar at the very end. This acidic hit acts as a highlighter for all the other flavors.
For Meal Prep, remember that these dishes often taste better on day two. As the dish cools, the flavors continue to infuse and the starches stabilize. When reheating, add a tablespoon of water or broth to the container before microwaving or heating on the stove to prevent the proteins from becoming rubbery through dehydration.
The Wrap-Up:
Mastering the art of the one-pot meal is like gaining a culinary superpower. You have learned how to harness the Maillard reaction, the importance of deglazing, and the science of collagen conversion. These nine one pot beef recipes are more than just food; they are a testament to how smart cooking can make life both easier and more delicious. Now, go forth, use your heavy-bottomed skillet with confidence, and enjoy the rich, savory rewards of your labor.
The Kitchen Table:
How do I prevent my beef from getting tough?
Ensure you are using a cut with high connective tissue, like chuck roast, and simmer it at a low temperature. High heat causes muscle fibers to contract and toughen, while low heat allows collagen to melt into gelatin.
Can I make these recipes in a slow cooker?
Yes, but always sear the beef in a skillet first. The slow cooker cannot reach the temperatures required for the Maillard reaction, so you will miss out on the deep, caramelized flavors that define a great beef dish.
What is the best way to thicken the sauce?
The most effective way is reduction; simmering with the lid off to evaporate water. Alternatively, whisk in a "beurre manie" (equal parts softened butter and flour) or a cornstarch slurry for an instant, glossy thickening effect.
How long does one pot beef stay fresh?
When stored in an airtight container in the refrigerator, these recipes will maintain peak quality for three to four days. The flavors often deepen over the first 24 hours as the ingredients continue to marry.